Introduction
Ladder falls remain the leading cause of workplace fatalities in construction. In 2024, construction workers experienced 370 fatal falls, slips, and trips, and ladders were the primary source in 161 fatal work injuries in 2020.
Slopes and uneven ground dramatically amplify these risks. NIOSH research confirms that even a slight lateral slope shifts the ladder's center of mass outside its base of support, creating tip-over conditions that can occur with minimal user movement. A ladder that shifts just inches on a slope can send a worker off balance with no warning.
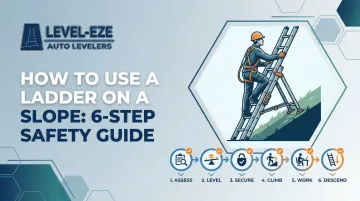
Getting the setup right matters. This guide covers a 6-step process for using a ladder safely on slopes, plus the equipment that removes the guesswork and keeps both feet on the ground.
TLDR
- Inspect for bent rails, cracked rungs, and damaged feet before every slope setup
- Assess slope severity and soil type first; this determines your leveling method
- The 4:1 angle rule still applies on slopes but is harder to maintain without proper leveling
- Never prop ladders on rocks, lumber, or improvised stacks—only purpose-built levelers or prepared ground
- Test stability from the ground before climbing; any wobble is non-negotiable to fix
- Follow all 6 steps in sequence; skipping any one of them is where most slope accidents start
Why Slopes Are Dangerous for Ladders
A ladder on a slope means the two feet make unequal contact with the ground, shifting the center of gravity and creating lateral lean that worsens as weight moves upward. When one foot sits higher than the other, the ladder's center of mass drifts toward the downhill side. Even slight user movement can push that center of mass outside the narrow base of support formed by the two rails, triggering an instant tip-over.
Soft or unstable soil adds to the danger. One foot may sink or shift mid-climb, turning a stable setup into an unpredictable hazard. Unlike a static uneven hard surface where conditions remain constant, soft ground introduces unpredictable failure risk: the ladder may feel stable initially but shift without warning as soil compresses under load.
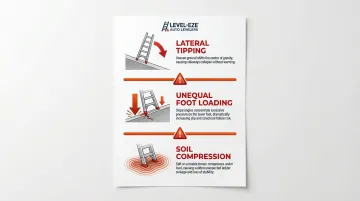
The risk isn't just slipping backward. Slope conditions create three distinct hazards:
- Lateral tipping — side falls happen faster and offer less time to react than backward falls
- Unequal foot loading — the downhill foot bears more weight, increasing the chance of sudden slide-out
- Soil compression — soft ground can shift mid-climb even after the initial setup feels solid
That's why slope work demands a different setup process from the start.
Before You Climb: Essential Pre-Setup Checks
Ladder Inspection Specific to Slope Work
Walk through this pre-use checklist before every slope setup:
- Check for bent or damaged rails that could compromise structural integrity
- Inspect rungs for cracks, splits, or looseness
- Verify rubber feet pads are intact and not worn smooth
- Confirm fly section locks engage securely on extension ladders
- Look for any deformation or stress marks
Any of these issues are disqualifying on a slope, even if they seem minor on flat ground. OSHA requires inspection before initial use in each work shift and after any occurrence that could affect safe use — slope conditions leave zero margin for a compromised ladder.
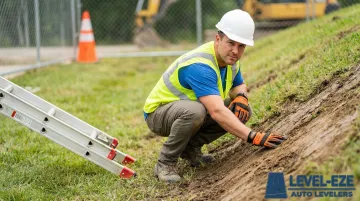
Reading the Slope and Ground Conditions
Before touching the ladder, assess the terrain:
Slope Grade: Estimate the angle and measure the height difference between where the two feet will sit. A 6-inch difference over the ladder's base width creates significant instability.
Soil Type: Determine if the ground is soft (workable with a shovel) or hard (requires a different approach). Press your foot into the soil—if it gives easily, it's soft; if it's rigid, it's hard.
Hidden Hazards: Look for buried roots, loose gravel, wet patches, or debris that could shift under load.
This assessment determines your setup method. Soft ground can be dug and compacted to create a stable base. Hard ground requires platform construction or an automatic leveling device that adjusts to the surface without any digging.
Work Area Setup
Before positioning the ladder:
- Clear debris and obstructions from the base zone to prevent tripping or interference
- Confirm enough horizontal clearance for the correct angle — one foot out for every four feet of height
- Station a spotter at the base; on slope setups, a second person isn't optional — it's part of a safe setup
The 6-Step Guide to Using a Ladder Safely on a Slope
Step 1: Select the Right Ladder for the Job
Extension ladders are standard for slope-to-structure work but have only two ground contact points, making leveling critical. Step ladders with four contact points are more forgiving on mild slopes, but authoritative guidance states that stepladders require level ground support for all four side rails—if this condition doesn't exist, a stepladder should not be used.
Confirm the ladder's duty rating covers your weight plus tools and materials:
- Type IAA: 375 pounds (extra heavy duty)
- Type IA: 300 pounds (extra heavy duty)
- Type I: 250 pounds (heavy duty)
- Type II: 225 pounds (medium duty)
- Type III: 200 pounds (light duty)
There is no relationship between ladder length and weight capacity—always verify the duty rating sticker before proceeding.
Step 2: Prepare the Ground Beneath the Base
On soft ground:
- Use a shovel to cut down high spots and fill low spots
- Compact the surface firmly by tamping with your foot or a hand tamper
- Cover with a firm ladder mat or solid board to prevent leg sinkage and distribute load
- Ensure both feet sit on equally firm, compacted ground
On hard, uneven ground:
- Assess whether building a sturdy temporary platform is feasible
- The platform must resist buckling and tipping under full load
- Use engineered lumber or metal plating, never loose rocks or scrap timber
- Verify the platform won't shift when weight is applied
Never use: Loose rocks, bricks, paint cans, or scrap lumber. OSHA explicitly prohibits placing ladders on boxes, barrels, or other unstable bases.
Step 3: Choose and Apply the Right Leveling Method
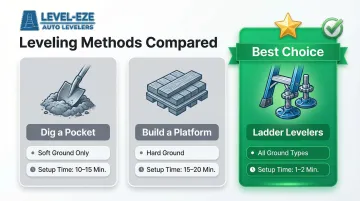
Three options exist for leveling a ladder on a slope:
Option 1: Dig a pocket on the high side to allow both feet to sit level. Works on soft ground only; requires significant time and effort.
Option 2: Build a solid platform base using engineered materials. This works on hard ground but requires construction skill and adds setup complexity.
Option 3: Use ladder levelers with individually adjustable feet. Levelers like Level-EZE — tested by Underwriters Laboratories at four times the ladder load rating — work reliably across ground types without modifying the surface. They meet all ANSI A14.2 standards for portable extension ladders and are the go-to choice for professional and repeat use.
Automatic levelers eliminate the balancing act of manual adjustment — both feet stay on the ground and both hands stay on the ladder throughout the process.
Step 4: Set the Ladder at the Correct Angle
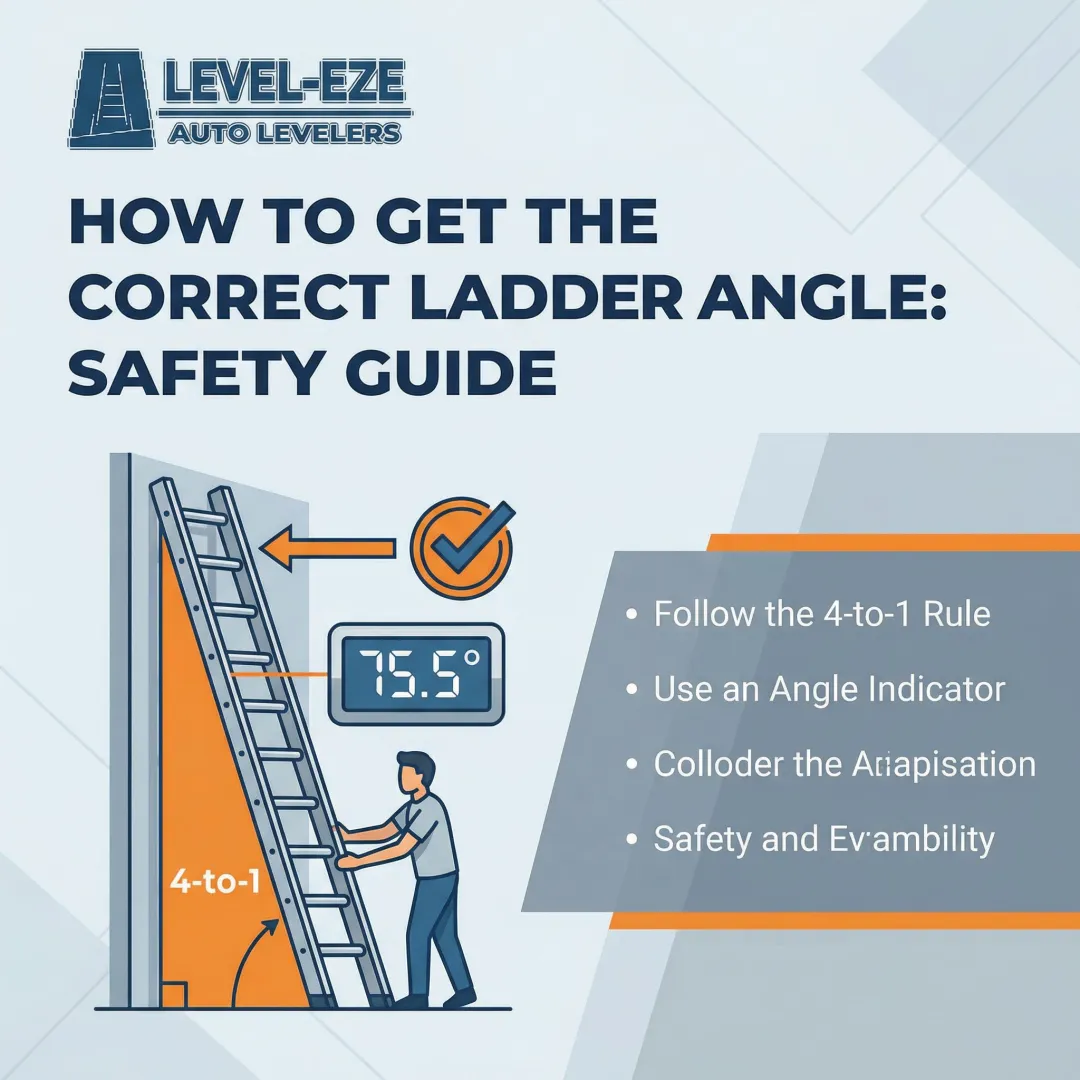
Apply the 4:1 rule: the base should sit one foot away from the wall for every four feet of working height. This corresponds to approximately 75.5 degrees.
On a slope, this angle is harder to judge because uneven ground skews your visual perception. The ladder should not feel like it's leaning toward or away from the structure.
To verify the setup angle, consider using the free NIOSH Ladder Safety App, which uses your phone's sensors to confirm you've hit the 75.5-degree mark.
Step 5: Secure the Base and Top
Base securement:
- Stake the feet into soft ground using metal stakes or anchor pins
- Use non-slip ladder feet pads on hard surfaces
- Ensure the base cannot kick out under load
Top securement:
- Lash or tie the top of the ladder to the structure when possible
- OSHA requires ladder side rails to extend at least 3 feet above the upper landing surface, or the ladder must be secured at its top to a rigid support
Spotter positioning:Confirm a spotter is positioned to hold the base during the initial ascent. This is especially important during the first climb before the ladder is confirmed stable under load.
Step 6: Test Stability Before Committing Your Full Weight
With the base and top secured, run a quick stability check before committing your full weight:
- Place both hands on a low rung and apply downward pressure
- Push laterally to test for side-to-side movement
- Take one step up and pause to feel for any shift, wobble, or foot movement
If the ladder moves at all, descend immediately and re-level. Instability at the base gets worse as you climb higher, not better.
Slope-Ready Equipment: Your Leveling Options Explained
Comparing the Three Main Leveling Approaches
| Method | Ground Type | Setup Time | Safety | Practicality |
|---|---|---|---|---|
| Ground Preparation (digging/compacting) | Soft ground only | 10-15 minutes | Moderate—depends on execution quality | Low—labor-intensive, weather-dependent |
| Temporary Platforms | Hard ground | 15-20 minutes | Moderate—requires construction skill | Low—requires materials, adds complexity |
| Ladder Levelers (adjustable feet) | All ground types | 1-2 minutes | High—engineered for the task | High—works reliably without ground modification |

Not all levelers work the same way, though—and the difference between manual and automatic matters more than most users realize.
Manual vs. Automatic Levelers
Manual/ratchet levelers require crouching down to adjust each foot separately—sometimes with the ladder already leaning against the surface. The user ends up supporting the ladder with one hand while adjusting with the other.
Automatic levelers engage the moment the feet touch the ground. Both hands stay on the ladder, both feet stay on the ground, and setup takes seconds instead of minutes.
The Engineering Behind Level-EZE
Level-EZE represents the professional standard in automatic ladder leveling technology:
- ANSI-certified for portable extension ladders
- Tested by Underwriters Laboratories at four times the ladder load rating without a single failure
- Life-cycle tested over 90,000 times with no failures
- Adds approximately four inches to the base width for increased stability
- Accommodates up to 9.5 inches of height difference between feet
- Locks with as little as 9 lbs of weight applied to the ladder
Level-EZE is available factory-installed through major ladder manufacturers including Werner, Louisville, Bauer, and Little Giant, or as an aftermarket retrofit kit that fits any width or length of aluminum or fiberglass ladder.
Efficiency Advantage for Professionals
For professionals who reposition ladders frequently on sloped terrain—utility workers, telecom technicians, roofing contractors—automatic levelers save an average of six minutes per ladder move. That adds up to an 11% gain in work efficiency—time no longer lost to digging, shimming, or manual adjustments.
Common Mistakes to Avoid When Using a Ladder on a Slope
Mistake 1: Propping the Low Foot on Improvised Materials
Rocks, scrap lumber, bricks, and paint cans are all commonly seen and all dangerous. They can shift, crush, or slip out without warning. This is one of the most cited causes of ladder falls on uneven ground, and the fact that something looks stable doesn't make it safe.
NIOSH research confirms that when ground conditions are not level or firm enough, workers frequently resort to using objects like boards, bricks, or stones as wedges — creating highly unsafe conditions. The only acceptable alternatives are:
- Purpose-built ladder leveling equipment (such as automatic levelers)
- Compacted ground preparation done before setup
- A solid, engineered platform rated for the load
Mistake 2: Skipping Ground Assessment and Going Straight to Setup
Many ladder accidents on slopes happen because the worker set up quickly without reading the ground conditions. They didn't notice the soil was soft on one side, or didn't account for a slight grade that became a bigger problem mid-climb.
Always spend 60 seconds assessing before touching the ladder. Check slope grade, soil type, hidden hazards, and clearance requirements. That brief check prevents falls that can mean broken bones, months off work, or worse — permanent injury.
Mistake 3: Assuming a Level Top Means a Level Base
A ladder can look plumb against a wall while the base is actually skewed or unevenly loaded. The visual alignment at the top doesn't guarantee stability at the base.
Always verify stability at the base independent of how the ladder looks from above or against the structure. Test for wobble, check that both feet have equal ground contact, and confirm the 4:1 angle before climbing.
Conclusion
Safe ladder use on a slope comes down to one thing: a repeatable setup process executed every single time, regardless of how slight the incline looks or how tight the schedule is. The 6-step process outlined here represents the minimum standard for safe ladder use on uneven terrain.
If you work on slopes regularly, invest in purpose-built leveling equipment. Level-EZE automatic levelers save an average of six minutes every time the ladder is moved, eliminate human error through automatic operation, and meet OSHA's requirement that ladders be "secured" or "stabilized" on unlevel surfaces. They're UL-tested at four times the ladder load rating and ANSI-certified — precision that manual methods simply can't replicate.
Frequently Asked Questions
What is the correct angle for a ladder on a slope?
The 4:1 rule applies: one foot of base distance per four feet of height, roughly 75 degrees. On a slope, this angle must be measured carefully since the ground itself isn't level. Level the feet first before checking the angle to ensure accuracy.
What should you never use to prop up a ladder on uneven ground?
Never use rocks, loose lumber, bricks, paint cans, or any improvised stacking material—they can shift or collapse under load. Only purpose-built leveling equipment, compacted prepared ground, or a solid engineered platform should be used.
Can you use a step ladder on a slope?
Step ladders offer more stability on mild slopes because they have four ground contact points instead of two, but they still require all four feet to be on solid, level ground. For any meaningful slope, adjustable-leg step ladders or automatic leveling feet attachments — like the Level-EZE — are the reliable fix.
How do ladder levelers work on sloped ground?
Ladder levelers have individually adjustable feet that extend to different lengths to compensate for uneven ground, keeping the ladder plumb and both rails evenly loaded. Automatic versions engage on contact with the ground without requiring manual adjustment.
How far are ladder steps from each other?
Standard ladder rung spacing is approximately 12 inches apart per OSHA and ANSI guidelines.
How far will a 24 ft extension ladder reach?
A 24-foot extension ladder typically provides a maximum working height of around 21 feet (accounting for the 3-foot overlap between sections). On a slope, effective reach can drop by a foot or more if the base must be moved outward to clear uneven ground — factor this in before you set up.