Introduction
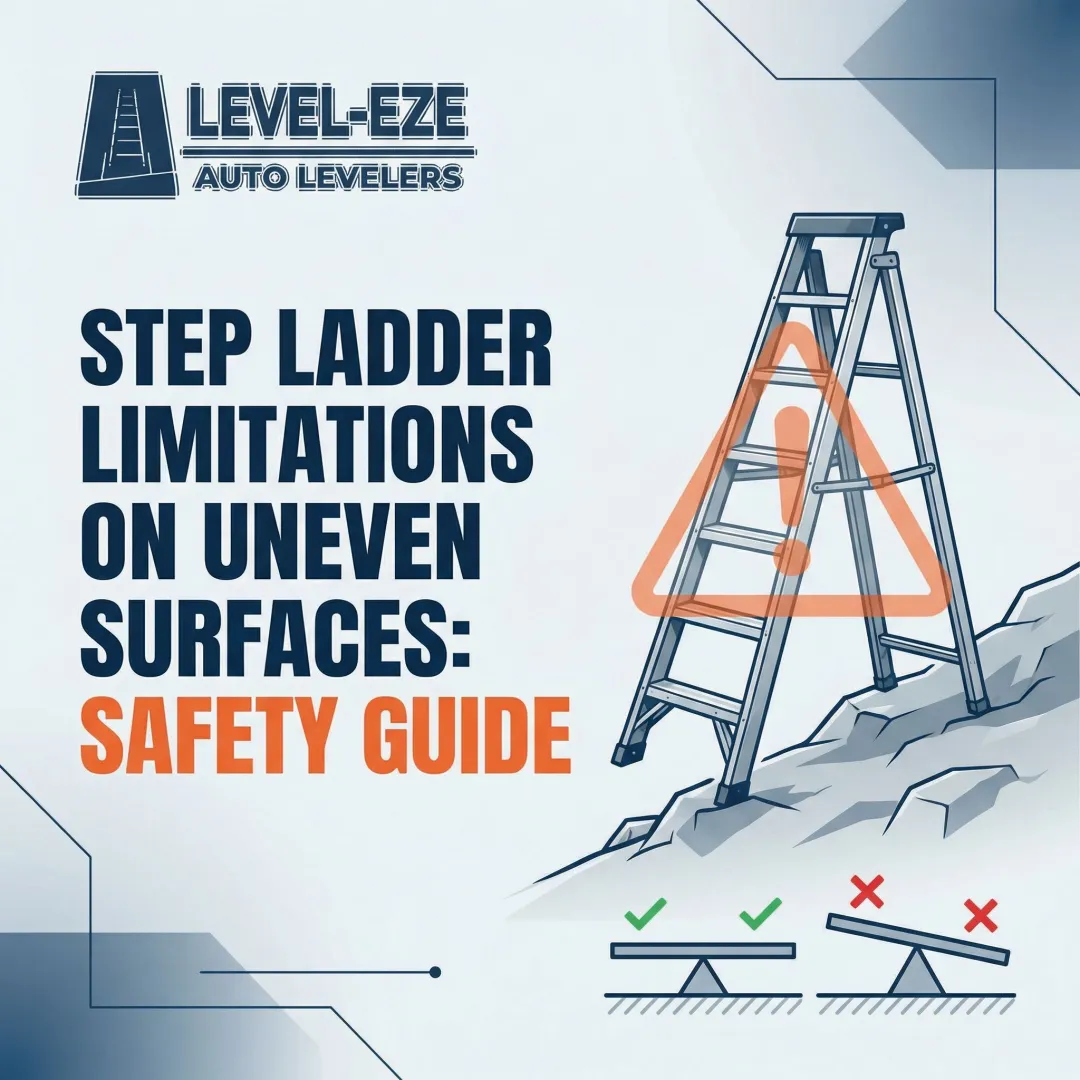
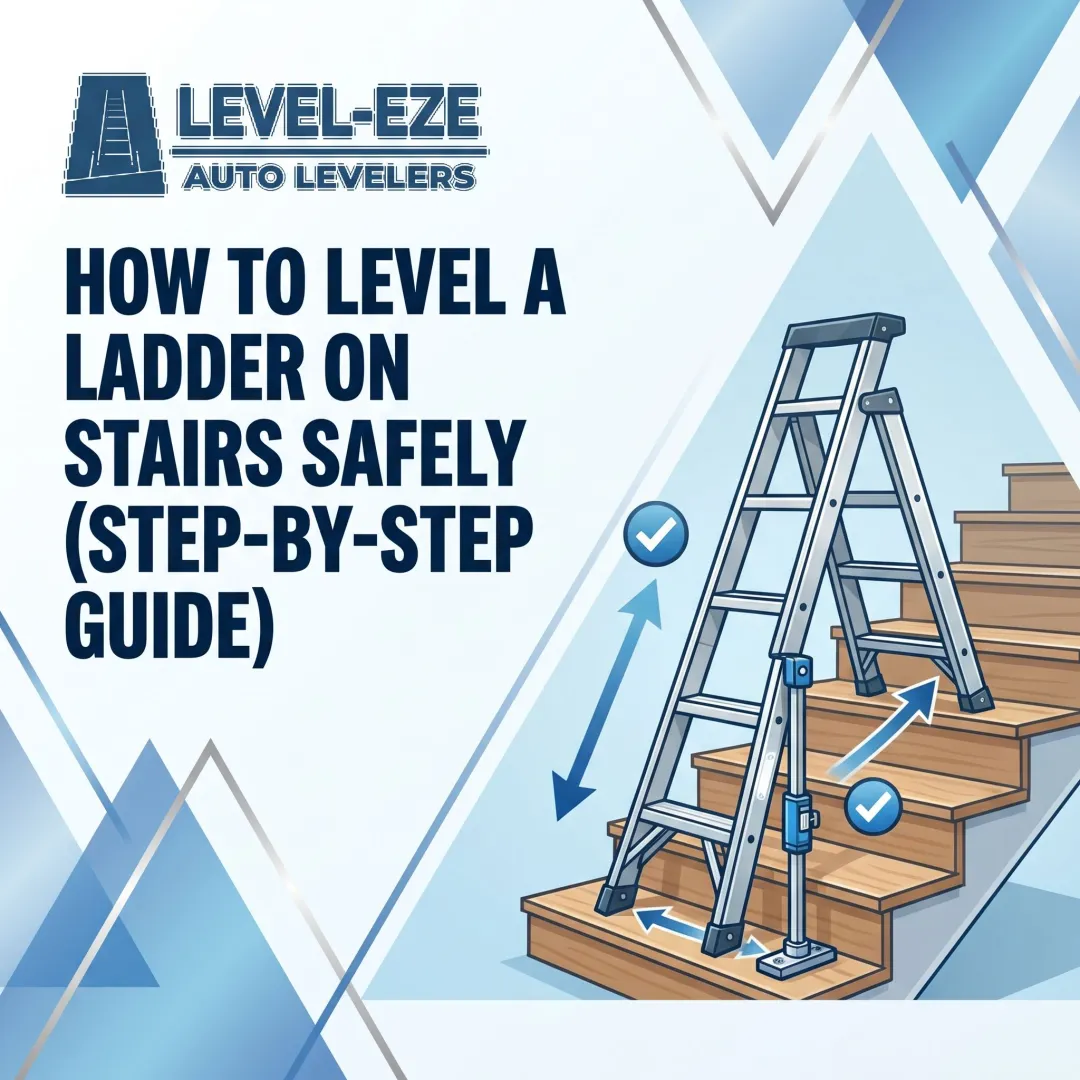
Ladder-related falls remain one of the most preventable workplace hazards, yet approximately 40% of ladder-related fall injuries stem from the ladder sliding out at the base due to incorrect setup angle. The problem gets worse when extension ladders are deployed on uneven surfaces—steps, slopes, curbs, rooftops—where establishing a stable base becomes significantly more difficult. That's where ladder leveling kits come in.
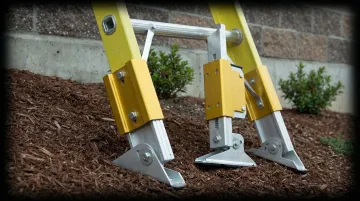
A ladder leveling kit is an adjustable foot assembly or automatic leveling mechanism that attaches to the base of an extension ladder's side rails, allowing each leg to independently compensate for height differences on uneven ground. For contractors, tradespeople, utility workers, and safety-conscious homeowners who need to retrofit existing ladders rather than purchase pre-equipped models, understanding the correct installation process is critical.
When installation is done incorrectly, the risks are concrete: the leveler may fail to lock under load, the base can shift unexpectedly, and ANSI compliance gets compromised. This guide walks through the complete installation process—from compatibility verification to final functional testing—so you can deploy with confidence.
TL;DR
- Installing a ladder leveling kit requires 30–60 minutes, basic hand tools, and strict attention to manufacturer torque specifications
- Compatibility between your ladder's base rail dimensions and the leveling kit must be confirmed before purchase
- Installation follows four critical stages: compatibility check → rail attachment → hardware torqueing → functional testing
- Always validate the locking mechanism on flat ground before field deployment
- Level-EZE levelers are available factory-installed through major manufacturers like Werner and Louisville Ladder for teams that want zero installation risk
Installation Guide for a Ladder Leveling Kit
A ladder leveling kit consists of an adjustable foot assembly or automatic leveling mechanism that attaches to the base rails of an extension ladder. The system allows each leg to independently compensate for height differences, maintaining ladder stability on uneven terrain. Modern automatic levelers—like those from Level-EZE—adjust instantly when the ladder is set down, locking in place with as little as 9 lbs of applied weight.
Expect the retrofit installation to take 30–60 minutes for a first-time installer working with basic hand tools. Automatic leveling mechanisms require no ongoing manual adjustment once installed; manual spacer-style kits require repositioning each time the ladder moves.
That upfront time investment adds up quickly. Studies show properly leveled ladders increase work efficiency by up to 11%, saving approximately six minutes every time the ladder is repositioned.
Prerequisites and Safety Considerations
Compatibility verification comes first. Confirm your ladder's side rail tube dimensions, rung spacing, and weight capacity class match the leveling kit's specifications. While some kits claim universal fit, most are engineered for specific rail sizes and duty ratings. For example, Level-EZE's universal design accommodates any ladder width or length but requires custom-cutting an aluminum rod to match your specific ladder dimensions.
ANSI compliance is non-negotiable. ANSI A14.2-2017 (the standard for portable metal ladders) explicitly excludes ladder accessories including levelers. Instead, leveling accessories are governed by ANSI A14.8-2020, which prescribes safety requirements for accessories used with portable ladders. Installing a non-compliant kit can void manufacturer warranties and create serious liability exposure for commercial users.
Do not proceed with installation if:
- Side rails show damage, corrosion, or structural deformation
- The ladder already exceeds its rated load capacity
- Base sections exhibit cracks or compromised welds
- Any structural component appears weakened
Tools and Parts Required
Essential tools:
- Socket/wrench set (7/16″ for most kits; verify against your kit's specifications)
- Torque wrench (non-negotiable for proper installation)
- Measuring tape
- Hacksaw (for cutting aluminum connecting rod)
- Drill with 5/16″ bit
- Center punch
- Screwdriver
Optional but helpful:
- Rubber mallet for seating press-fit components
- 1¼″ hole saw (for fiberglass ladders with riveted rungs)
- Dust mask and gloves (fiberglass work)
What comes in a typical kit:
- Leveling mechanism assembly (2 pre-assembled legs)
- Mounting brackets or backer plates (typically 6)
- Hardware pack (bolts, hex nuts—usually 12)
- Square solid aluminum connecting rod
- Installation template
- Installation instructions
Inventory all parts against the kit's parts list before starting. Most kits warn explicitly: DO NOT SUBSTITUTE ANY COMPONENTS. Using non-original parts compromises UL testing certifications and voids ANSI compliance.
Spring compressors and specialty suspension tools are not required.
How to Install a Ladder Leveling Kit (Step-by-Step)
Installation follows a defined sequence. Skipping steps—especially compatibility checks and torque verification—causes the majority of field failures.
Step 1 — Prepare the ladder and workspace
Lay the ladder flat on a clean, stable surface. Inspect the base rail section thoroughly for corrosion, cracks, or existing damage. Clean the mounting area of dirt and grease to ensure brackets seat flush against the rails. Confirm the ladder is in the closed/retracted position before beginning.
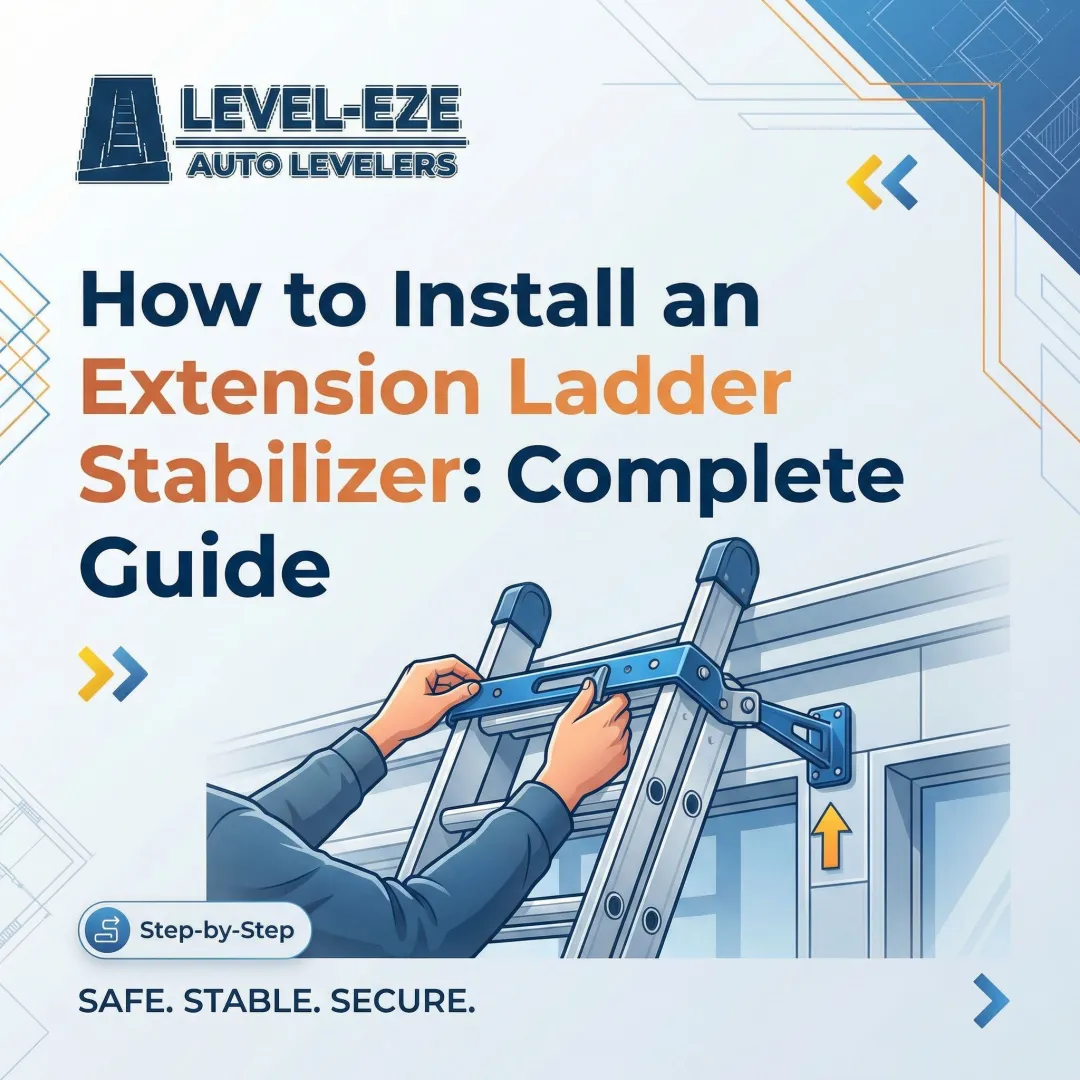
Step 2 — Position the leveling mechanism on the base rail
Slide or clamp the leveling assembly onto the side rail following the kit's instructions. For automatic levelers like Level-EZE's design, ensure the pivot axis aligns perpendicular to the rail—misalignment causes uneven leg extension and compromises stability. Use your measuring tape to verify symmetry on both rails before tightening any hardware. Mark hole locations using the provided template, then use a center punch to create drill guides.
Step 3 — Secure mounting hardware to specification
Install all bolts, backer plates, and nuts by hand first to ensure threads engage correctly. Once hand-tight, tighten to the torque values specified in your kit's instructions using a calibrated torque wrench.
Werner and Levelok kits specify 9 ft-lbs of torque. That precision matters: under-torqued hardware loosens with vibration during transport; over-torquing can crack mounting brackets or damage thin-wall rails. If your kit includes nylon insert locknuts (prevailing-torque locknuts per ASME B18.16.6), these provide additional vibration resistance in high-duty environments.
Step 4 — Test the leveling mechanism function before field use
With the ladder still on flat ground, manually trigger the leveling legs through their full range of motion. Push on one leg individually—both legs should move freely. Then push on both legs simultaneously—they should lock together positively.
For automatic levelers, apply light downward pressure (typically 9 lbs minimum for Level-EZE systems) and confirm the locking mechanism engages with a definitive click or firm resistance. Both legs must move independently and lock independently. If movement is restricted or locking inconsistent, disassemble and repeat the installation steps—do not deploy the ladder.
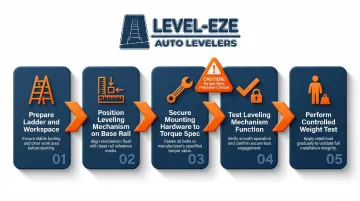
Step 5 — Perform a controlled weight test
Stand the ladder upright on flat ground and set it at the correct OSHA-mandated angle: 4:1 ratio (75.5°). The horizontal distance from the top support to the foot of the ladder should equal approximately one-quarter of the working length.
Apply body weight to the bottom rung while a second person observes the base. Confirm no movement, slippage, or unlocking occurs under load. This two-person validation catches installation errors before they become fall hazards.
Post-Installation Checks and Validation
Visual and structural inspection:
- All fasteners fully seated with no gaps
- Brackets aligned parallel to rails (not cocked)
- Leveling mechanism housing shows no cracking or distortion
- Mounting hardware has not deformed or dimpled rail walls
- Connecting rod moves smoothly through the rung
Functional validation on simulated uneven ground:
This is the most critical pre-deployment test. Prop one side of the ladder base on a board or step (approximately 1–2 inches height difference) and confirm the leveler compensates and locks at correct extension before applying body weight. Repeat on the opposite side.
Level-EZE's steel gears adjust in 3/16-inch increments up to 9.5 inches maximum range—you should feel smooth, controlled engagement at each increment. Jerky movement or failure to lock indicates a problem.
Why validation matters: a leveler that appears correctly installed but has an under-seated bracket or misaligned pivot may function for several uses before catastrophic unlocking under load. Finding these issues in a controlled test environment prevents job-site injuries.
Common Installation Problems and Fixes
Even careful installations run into the same predictable snags. Here are the three most common problems, what causes them, and how to fix each one.
Issue 1: Leveling Mechanism Doesn't Lock or Locks Inconsistently
Problem: One or both legs fail to hold position under load, or the auto-lock engages intermittently.
Cause: The pivot axis was misaligned during installation, or the locking pawl isn't fully seated in its channel due to debris or incomplete assembly.
Fix: Disassemble the mechanism and clear any debris from the locking channel. Re-seat the pawl carefully, ensuring it engages fully. Reinstall with the pivot axis verified square to the rail before tightening hardware. Re-test on flat ground.
Issue 2: Unequal Leg Extension Between Left and Right Side
Problem: The ladder visibly tilts to one side even after the leveler engages, indicating the two assemblies aren't matched.
Cause: The mounting bracket on one rail was installed at a different height or angle than the other, or one mechanism wasn't fully extended during alignment.
Fix: Loosen mounting hardware on the affected side. Re-align the bracket to match the opposite rail's installation height exactly, using your measuring tape to confirm both sides are even. Re-torque to specification and re-test.
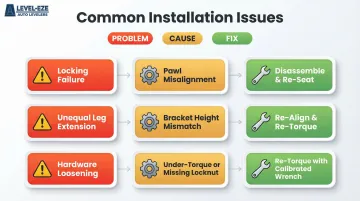
Issue 3: Hardware Loosens After First Field Use
Problem: Bolts back out after the ladder has been deployed, moved, and repositioned several times.
Cause: Fasteners were tightened by feel rather than to specified torque, or lock washers were omitted or incorrectly placed.
Fix:
- Re-torque all fasteners to the kit's specified values using a calibrated torque wrench
- Confirm lock washers or nylon insert locknuts are present and correctly oriented
- If loosening persists and the kit instructions permit, apply medium-strength threadlocker (blue Loctite) — never high-strength (red), which makes future maintenance nearly impossible
Pro Tips for Installing a Ladder Leveling Kit Effectively
Match the kit to your specific ladder model, not just rail size. Werner, Louisville, Little Giant, and Bauer all offer proprietary or approved aftermarket options. Factory-matched kits install more cleanly with less adjustment than generic alternatives. For high-frequency commercial use, factory-installed levelers eliminate field installation risk entirely and maintain full manufacturer warranty coverage.
Read the full instructions before touching a tool. Most installation errors — bracket misalignment, missed torque specs, skipped steps — come from improvising rather than following the manual. Level-EZE provides instructions specific to aluminum and fiberglass configurations. Skipping that guidance is how a 20-minute job turns into a rework.
Document the installation for compliance. Fleet and safety managers should log four data points for every ladder:
- Installation date
- Installer name
- Kit model number
- Torque confirmation
This creates a defensible maintenance record for incident investigations and demonstrates due diligence under OSHA's ladder safety requirements (29 CFR 1926.1053). Note that 29 CFR 1926.1053(b)(18) requires any ladder modification to restore the ladder to its original design criteria — a standard factory-matched kits are built to meet.
Know when to skip DIY. If the ladder's base rail shows pre-existing damage, or the kit will see extreme load-cycling (utility crews repositioning ladders dozens of times daily), professional or factory installation is the better call. The cost difference is small, but the liability exposure is not.
Conclusion
Installing a leveling kit correctly takes 30–60 minutes. That time directly affects ladder stability, ANSI compliance, and whether your workers go home safe. With 40% of ladder fall injuries caused by base slide-outs and the average workers' compensation claim running $54,499, a proper installation is one of the most straightforward safety decisions you can make.
For workers who move ladders frequently on uneven terrain, consider an automatic leveling solution like Level-EZE. Manual re-leveling under time pressure is where most errors happen. Automatic systems engage the moment the ladder is set down, so there's no judgment call, no delay, and no failure point to manage. Level-EZE has been doing this for over 25 years and is tested to meet all ANSI standards for portable extension ladders — which is exactly the kind of assurance worth having before anyone climbs.
Frequently Asked Questions
How much would it cost to get a leveling kit installed?
Leveling kit prices range from approximately $90 to $280 depending on brand and mounting style. DIY installation adds no labor cost, but you'll need to follow torque specifications carefully to maintain warranty coverage.
Can I install a ladder leveling kit myself without professional help?
Most retrofit kits are designed for DIY installation with standard hand tools and take 30–60 minutes to complete. However, accuracy in alignment and torque is non-negotiable—improper installation compromises safety and may void warranties. High-duty commercial environments may warrant professional or factory installation for liability protection.
Do ladder leveling kits work on all extension ladder types?
Most kits are designed for specific rail dimensions and weight class ratings. Verify compatibility with your ladder's make, model, and duty rating before purchasing. Universal-fit designs like Level-EZE accommodate varying ladder widths through custom-cut connecting rods, but all kits have maximum duty rating limits (typically up to Type 1AA 375 lb).
Is a ladder leveling kit ANSI compliant?
Compliant kits meet ANSI A14.8-2020 standards for ladder accessories, not ANSI A14.2 (which governs ladders themselves but excludes accessories). Verify the kit carries tested and certified status—look for UL-tested or ETL marks rather than assuming compliance based on price or marketing claims.
How long does it take to install a ladder leveling kit?
Most first-time installs take 30–60 minutes. Budget extra time for alignment verification and functional testing — these steps directly affect safety and shouldn't be skipped. Repeat installs typically run closer to 25 minutes.
Does installing a leveling kit affect my ladder's weight capacity or warranty?
A correctly installed, manufacturer-approved leveling kit should not reduce the ladder's rated load capacity when installed per specifications. However, installing a non-approved or incompatible kit may void the ladder manufacturer's warranty. Always verify the kit is approved for your specific ladder model before installation.